Site-to-Site VPN using OpenVPN without SNAT
October 18th 2022
In this guide I assume you know the basics of Linux, VPNs, Networking, RouterOS, Certificates,... because explaining those things would go beyond the scope of this rather short guide.
I know, it's a lot to ask for. But you can easily find many tutorials and explanations of those things. Most of them explaining it better than I ever could.
The goal
The goal is to make a Site-to-Site VPN between a Mikrotik router and a Debian Machine without SNAT so all machines on the two sites can see the originating, un-nated IPs.
So if PC1 makes a request to SRV2, SRV2 will see 10.2.0.51 as source and send the response back to it. For this to work everyone in the line needs to have the correct routes set.
It doesn't matter if it's between a Mikrotik and a Debian machine or two Debian machines or whatever. Just make sure the server is not a Mikrotik device since their implementation of OpenVPN doesn't support CCD.
Prerequisites
- Certificates and Keys for server+client set up / imported and ready
- OpenVPN installed on both machines
ip_forwardenabled on both machines
Network layout
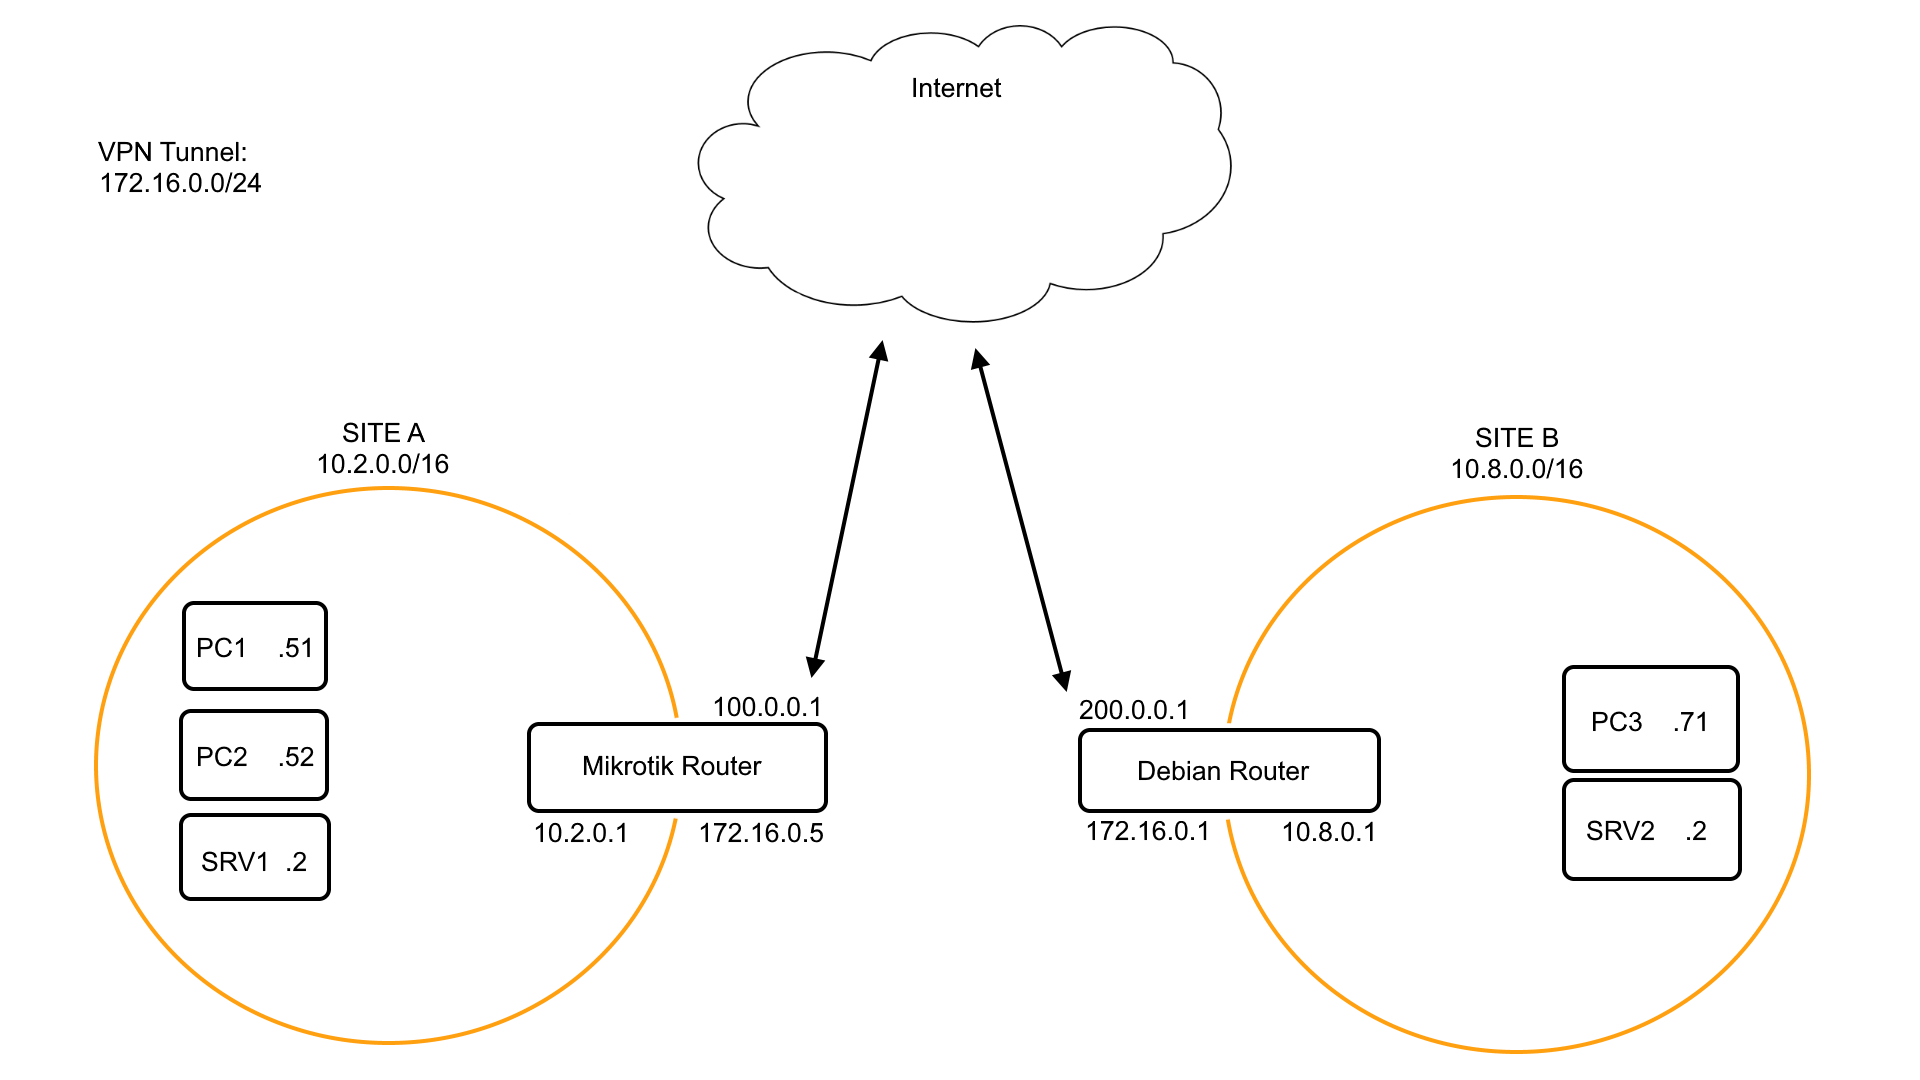
172.16.0.0/24 -> VPN Tunnel network
10.2.0.0/16 -> SITE A network
10.8.0.0/16 -> SITE B network
As you can see both our machines are directly on the internet with no router or firewall between them. This makes things a little easier for us.
Firewall
I will not explain firewall rules or portforwardings or whatever in this guide since if everything is allowed to go anywhere it should work. We are not MASQUERADING anything here so we don't need a single iptables command.
Setup your firewalls yourself.
The Server
Our Debian machine is going to be the OpenVPN server. Make sure openvpn is installed and ip_forward is enabled.
Configuration
/etc/openvpn/server.conf
dev tun0
port 1194
proto udp
user nobody
group nogroup

# mikrotik does not support other Ciphers like GCM
cipher AES-256-CBC

# change those paths
ca /etc/openvpn/ssl/your-ca.crt
cert /etc/openvpn/ssl/your-certificate.crt
key /etc/openvpn/ssl/your-private-key.key
dh /etc/openvpn/ssl/your-dh-params.pem

# tunnel network / dhcp pool for clients
# the server will pick the first IP for himself (172.16.0.1)
server 172.16.0.0 255.255.255.0

# automatically add route, basically
# ip route add 10.2.0.0/16 dev tun0
route 10.2.0.0 255.255.0.0

# push the route of Site-B to the client(s) so we don't have to set a static route ourself
push "route 10.8.0.0 255.255.0.0"

# persistant "dhcp"-leases
ifconfig-pool-persist /var/log/openvpn/ipp.txt

# important! explained later on
client-config-dir /etc/openvpn/ccd

# this is just for performance
sndbuf 512000
rcvbuf 512000
push "sndbuf 512000"
push "rcvbuf 512000"

# higher number -> more log
verb 3
/etc/openvpn/ccd
So, in order for the packets from Site-A to be handled by the OpenVPN server we need to somehow tell him those packets are OK and, more important, where to send the responses to.
This is where CCD comes into play. It basically Custom Configurations for clients but on the server.
-
create the folder
mkdir /etc/openvpn/ccd -
create the client config file
nano /etc/openvpn/ccd/<client-name>
client-nameis the client certificates Common-Name.
In this file we need to add the Site-A subnet so the OpenVPN server knows this specific client is routing 10.2.0.0/16. Like so:
iroute 10.2.0.0 255.255.0.0
Without iroute the OpenVPN-Server will just throw the packets away and tell you
MULTI: bad source address from client \[xxx.xxx.xxx.xxx\], packet droppedStarting the server
Starting the server from the shell (useful for troubleshooting)
openvpn --config /etc/openvpn/server.confStarting the server using systemd
systemctl start openvpn@server.serviceThe client
Configuration
Let's say the client is a MikroTik Router and forget their OpenVPN implementation is a little weird for a moment.
Create Interface
Interfaces -> Add New -> OVPN Client
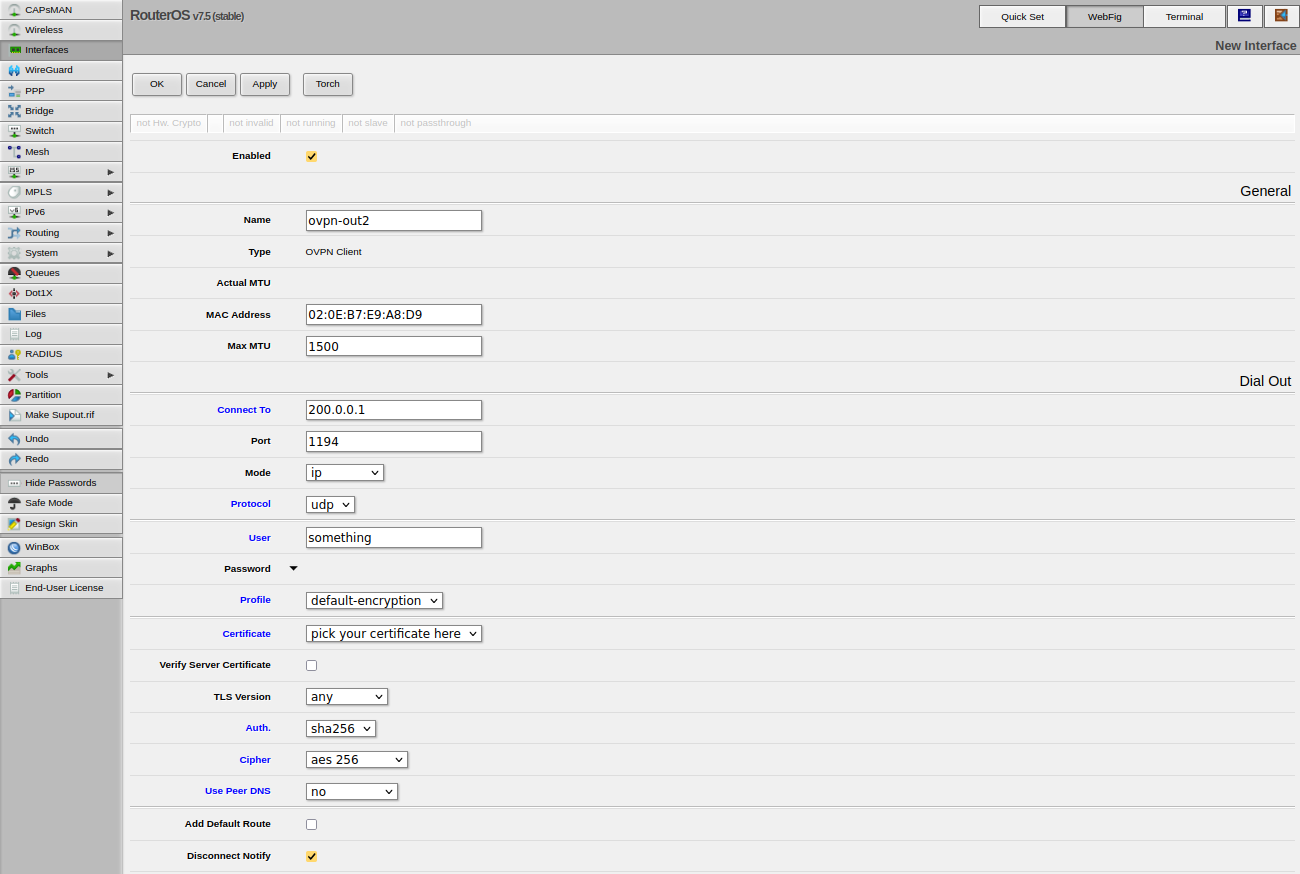
If you are not using username/password authentication on the ovpn-server you can just put in a random user-name because the field may not be empty.
Finishing up
And now, if everything was set up correctly you should see your MikroTik connecting successfully to your server.
Those sites explain the problem more detailed: